
Lorex LNB9252B Setup Complete Step-by-Step Installation Guide
The Lorex LNB9252B setup process involves mounting the bullet camera, connecting it to your NVR or power source, configuring the video feed, and enabling remote viewing through the Lorex app. This guide walks you through every step of the Lorex LNB9252B bullet camera setup, from unboxing to troubleshooting common issues like “No Video” errors. Whether you’re a first-time installer or upgrading your existing security system, this guide covers cabling, mounting, night vision configuration, and motion alert setup, everything you need for a smooth, fully functional installation.
What You'll Need Before Starting
Before diving into the lorex lnb9252b bullet camera setup, gather the following:
- Lorex LNB9252B bullet camera unit
- Compatible Lorex NVR (Network Video Recorder)
- Ethernet or BNC cable (depending on your model variant)
- Power adapter (if not using PoE)
- Mounting screws and a drill
- Smartphone or computer for app-based configuration
Step-by-Step Lorex LNB9252B Setup Process
Step 1: Choose the Right Mounting Location
Select a location that offers a clear, unobstructed view of the area you want to monitor. For outdoor installations, avoid placing the camera where direct sunlight will hit the lens for extended periods, as this can affect image quality. Mount the camera at a height of 8–10 feet for optimal coverage and to reduce tampering risks
Step 2: Mount the Camera Bracket
Using the included mounting bracket, mark the drill points on your chosen surface. Drill pilot holes and secure the bracket using the provided screws. Attach the camera to the bracket and adjust the angle to cover your desired field of view before fully tightening it in place.
Step 3: Connect the Cables
This is one of the most critical steps in the Lorex LNB9252B setup. Depending on your specific model configuration, you’ll either connect an Ethernet cable (for PoE-powered systems) or a BNC cable with a separate power adapter.
- Run the cable from the camera to your NVR, keeping it away from other electrical wiring to minimize interference.
- Ensure all connections are weatherproofed if the cable runs outdoors.
- Avoid excessive cable bending, which can damage internal wiring over time.
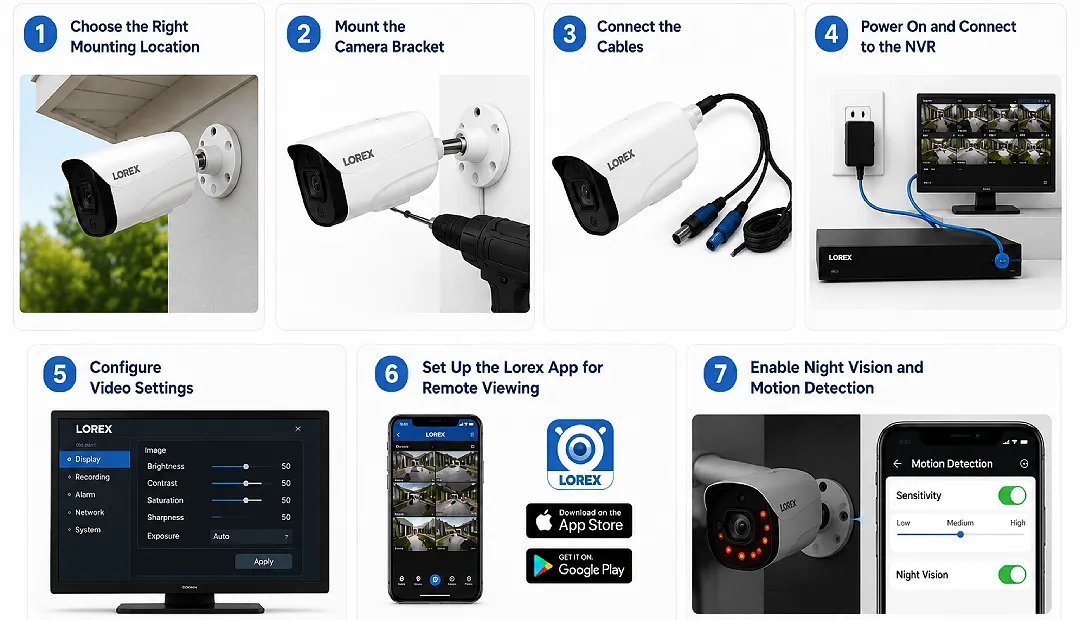
Step 4: Power On and Connect to the NVR
Once the camera is physically installed, power on your NVR. The system should automatically detect the new camera. If it doesn’t appear right away, navigate to the “Camera” or “Channel” settings menu on your NVR and manually search for new devices.
Step 5: Configure Video Settings
After the camera is detected, configure the resolution, frame rate, and recording schedule through your NVR’s interface. For the best image quality, set the resolution to the highest available option, keeping in mind that higher resolutions require more NVR storage space.
Step 6: Set Up the Lorex App for Remote Viewing
Download the Lorex app on your smartphone and log in with your account credentials. Add your NVR system using the QR code or serial number, and your Lorex LNB9252B feed should appear within minutes. This allows you to monitor your property remotely from anywhere with an internet connection.
Step 7: Enable Night Vision and Motion Detection
Within the camera settings menu, enable infrared night vision for clear footage in low-light conditions. Additionally, configure motion detection zones to receive alerts only when activity is detected in specific areas, reducing unnecessary notifications.
Troubleshooting Common Issues
- No Video Displayed: Check cable connections and ensure the NVR channel is properly assigned.
- Blurry or Distorted Image: Clean the lens and adjust focus if your model supports manual focus.
- App Not Connecting: Restart your router and re-sync the NVR with the Lorex app.
The Final Word
The Lorex LNB9252B setup is straightforward when the camera is mounted correctly, connected securely to the NVR, and configured through the Lorex app. Always test the camera feed immediately after installation, before sealing any cable entry points. Label your cables clearly if you’re installing multiple cameras, as this makes future Lorex camera setup troubleshooting far easier. And keep your NVR firmware updated to ensure compatibility with the LNB9252B and to receive the latest security patches. By following these steps carefully, your Lorex setup should be complete, functional, and optimized for both day and night surveillance.
Frequently Asked Questions
Can I complete the Lorex LNB9252B setup without an NVR?
Does the Lorex LNB9252B support night vision?
Why is my Lorex LNB9252B showing "No Video" after setup?
A “No Video” error usually indicates a loose or damaged cable connection, an incorrect channel assignment on the NVR, or a power supply issue. Reconnecting the cables securely and restarting the NVR often resolves this problem. If the issue continues, it may point to a broader system fault. Check our guide on Lorex Camera Not Working for additional solutions.