Detailed Lorex Security Camera Setup Steps
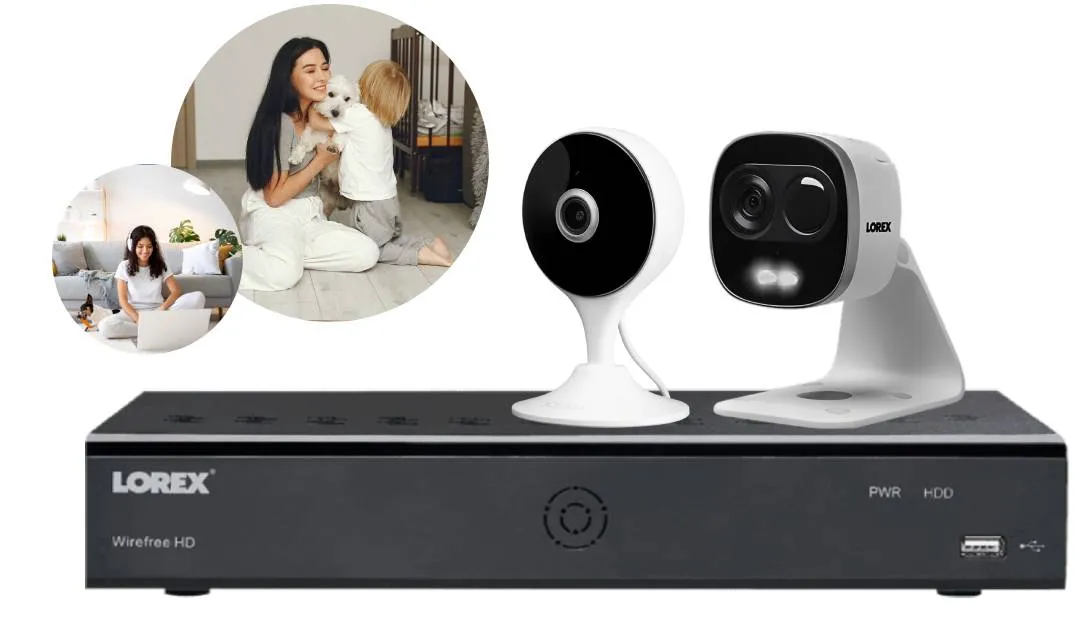
Overview of Lorex Security Cameras
Lorex has been in the security domain long before the words smart home became buzzwords. From DVR/NVR- based systems to WiFi-enabled security cameras, Lorex has been offering scalable and reliable surveillance solutions that fit both domestic and commercial security needs. Lorex security cameras are known for reliability, crisp video quality, and flexible installation options. These cameras can easily be installed in homes, offices, and your business sites. If you have purchased a new Lorex security camera setup, learning how to set it up and configure its network settings will come in handy. This page will walk you through all that you need to know about the Lorex camera setup process and how to resolve some common issues with the same, so you can continue ensuring safety and security of your space and its belongings.
What do you need before starting setup?
Even before you proceed with the lorex setup process, you will need to get the basics covered. Following are some items you will need to ensure that you have ready with you:
- Your Lorex security camera setup
- DVR or NVR if required
- A stable and activated internet connection
- A router with 2.4GHz WiFi band running
- Android/iOS smartphone that can download the Lorex app or even access a web browser if the need be
- A power source
- An ethernet cable
Once you have these ready with you, you can proceed with the lorex wireless camera setup process.
How to Set Up Lorex Camera for the First Time
If this is your first time setting up a camera, you can follow the simple steps we have described below for a smooth how to setup lorex camera experience:
Unboxing and checking package contents
Connecting the camera to power
Connecting Lorex camera to DVR/NVR
If you have a wired system, you can connect the camera to the DVR or the NVR using an Ethernet cable. This is an essential step in lorex camera internet setup, especially for wired camera models.
Initial boot and system check
Lorex Camera WiFi Setup (Step-by-Step)
- Supported Lorex Wi-Fi camera models
Not all Lorex cameras are wireless. You will need to confirm that your camera model supports the lorex wifi camera setup before you proceed. Check the user guide or the box to confirm the camera model and then accordingly proceed with the WiFi setup. - Network requirements for Wi-Fi setup
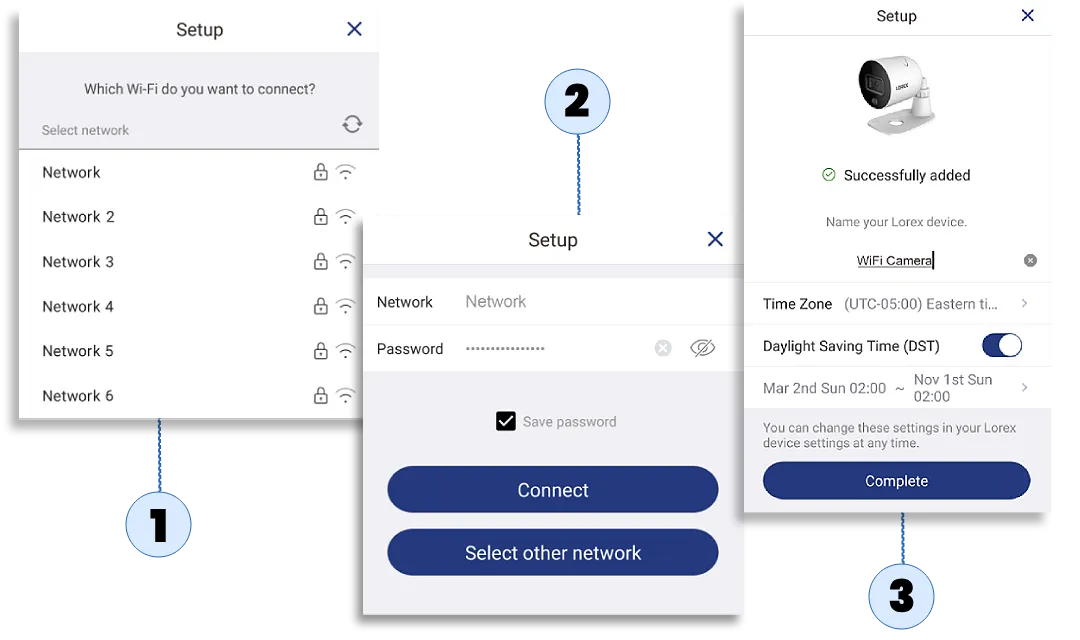
You will need to ensure that the WiFi channel is 2.4GHz that you are going to connect to. Also ensure that you have a strong signal near the camera location. Next, also check that the WPA or WPA2 security encryption is activated on the device. - Connecting Lorex camera to 2.4GHz Wi-Fi
During lorex wifi setup process, you will need to ensure that your phone is connected to the same 2.4GHz network that you want the camera on. - Confirming successful wireless connection
You will need to confirm that there is a solid indicator light or an in-app confirmation on the lorex app. This will indicate that your lorex wireless camera setup process is complete.
How to Set Up Lorex Camera Using Lorex Home App
The Lorex Home app is the easiest way to configure your lorex camera and make it work at your home. Below are some steps you can follow to get started with the lorex security camera setup process:
- Downloading the Lorex Home app
Download the app from the play store or the App store and install it on your smartphone. If you have the app already installed, ensure that it is updated to the latest version.
- Creating a Lorex account
Once installed, launch the app and click on the Create an account button to create a new Lorex account. This will take you through the account setup process. Follow the on-screen steps to create one. This account will be used to manage your Lorex cameras in the future.
- Adding a camera to the app
Once the account is set up, you can proceed with the Lorex camera login and tap on the Add a Device button you see on the screen. The app will now take you through some steps you can follow to proceed. A list of the camera models will be displayed to you on the screen. Select the camera model that you have.
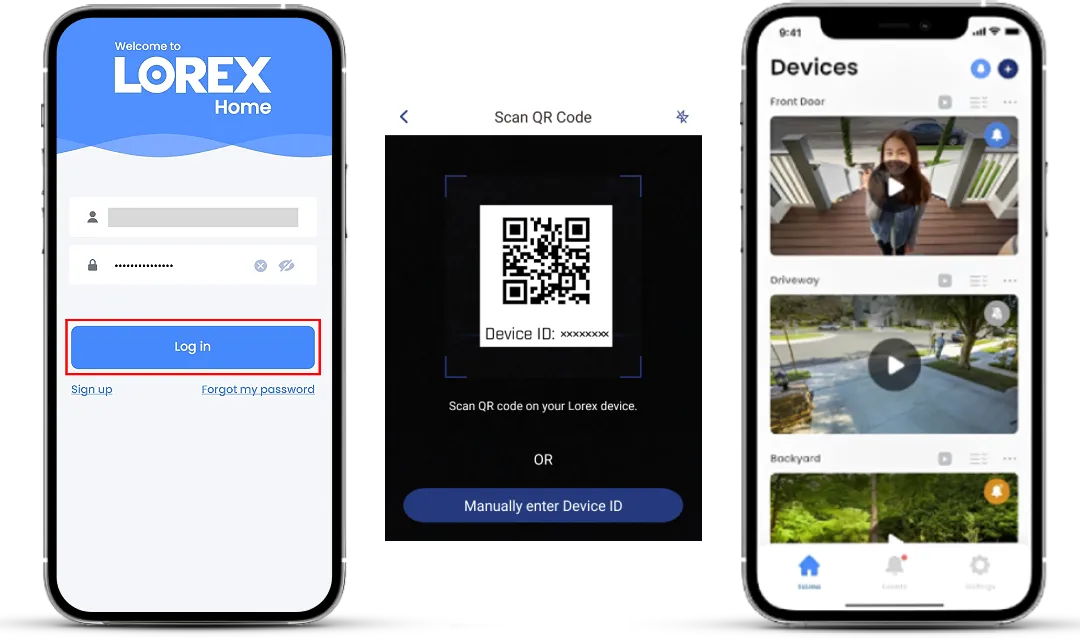
- QR code scanning method
The app will now ask you to scan the QR code on your camera device. Scan it using the scanner on the app. Once scanned and the device is detected, you will need to configure it with the WiFi at your home. Connect it to the 2.4GHz WiFi network and save the settings.
- Live view and basic settings
Once the camera is configured and connected to the WiFi at your home, you can use the Lorex app to view the live footage and also configure the basic camera settings. You can configure features like motion sensitivity, alerts, and more.
Lorex Camera Setup on Mobile Phone (Android & iPhone)
App compatibility for Android and iOS
The Lorex home app supports most Android and iOS devices. You can install the Lorex home app on your smartphones and then proceed with the Lorex camera phone setup process. You can follow the same steps as we discussed in the previous section to proceed with the same.
Mobile network vs Wi-Fi setup
Viewing live footage on phone
Managing notifications and alerts
Lorex Camera Setup Without DVR/NVR
Not everyone wants a full-blown security system, and that’s entirely fine. Lorex offers several camera models that are designed to work independently. This makes lorex setup possible even without investing in a dedicated DVR or NVR system. Such setups are ideal for apartments, small homes, temporary locations, and users who want to have quick deployment with minimal hardware involved.
- Standalone Lorex Camera Models
Certain Lorex WiFi cameras are built to operate independently using direct internet connectivity. These models support lorex setup without DVR/NVR by connecting straight to your home WiFi network and paring wth the Lorex home app. They are a perfect addition for users who want monitoring without running cables or managing recording hardware.
- Cloud Storage vs Local Storage
Standalone lorex camera setup models rely on either cloud-based storage or onboard SD cards for storing video feeds. Cloud storage allows the devices to secure off-site backups and thus easy playbacks and remote access as well. Local storage saves footage directly to the camera, usually to an SD card. This offers more privacy and zero monthly fee.
- Direct WiFi Camera Setup
Standalone cameras use lorex wifi camera setup through the lorex home app. There is no DVR or NVR and the app alone guides users through the entire process of connecting the camera to WiFi network and confirms the connection.
- Limitations without the DVR/NVR
While convenient, standalone setups come with trade-offs, you will lose out on features like continuous 24/7 recording, extended video history, advanced smart detection, or syncing multiple cameras into a single recording system. Multi-camera management is still possible, but it is app-based rather than system-based.
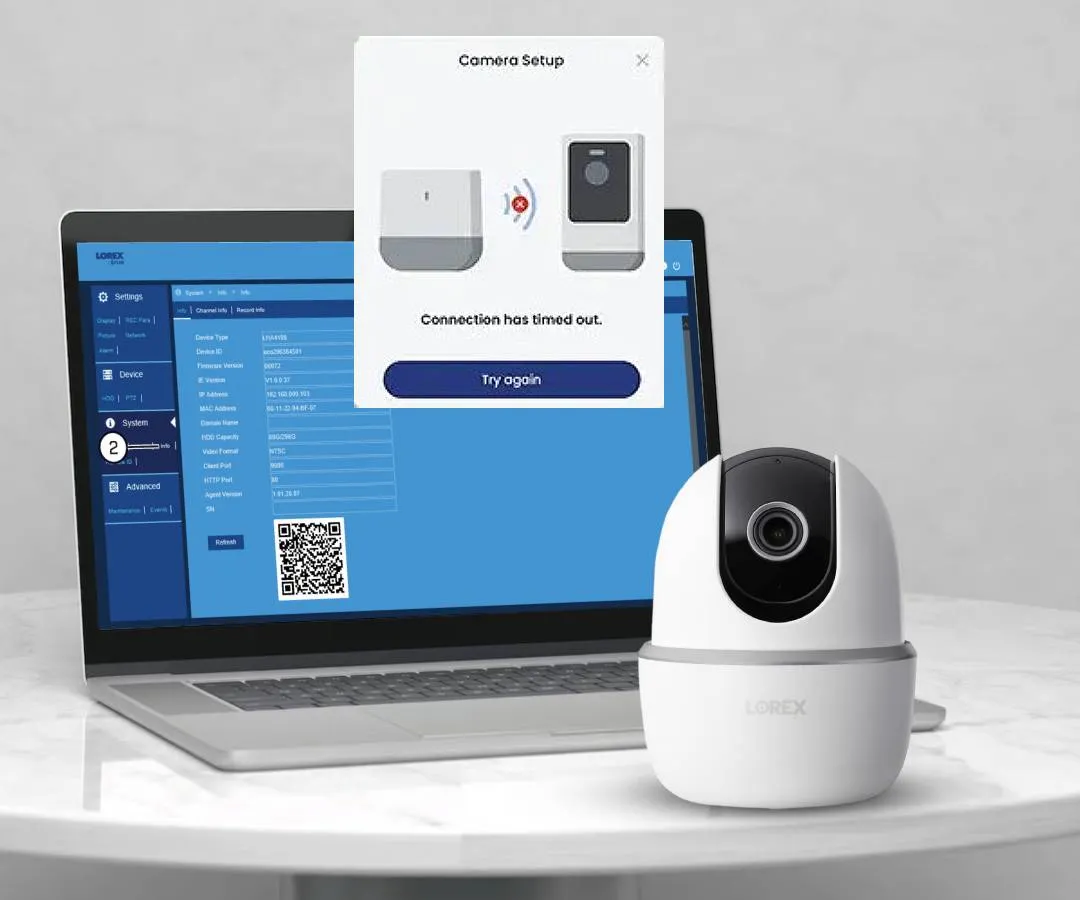
Lorex Camera Not Connecting to WiFi During Setup
One of the most common issues that a lot of users face is the Lorex camera not connecting to WiFi during setup process. If your camera refuses to connect during lorex wifi setup, you don’t need to panic. Most issues come down to network compatibility or minor setup problems.
- Common setup errors
Inorrect WiFI passwords, connected to the wrong network, setup incomplete, etc., are some of the biggest reasons for setup errors. Even a single typo in the password or settings can cause lorex camera internet setup issues.
- Wi-Fi compatibility issues
Lorex WiFi cameras are designed for 2.4GHz networks only. If your router is connecting to the 5GHz network band, you will need to shut it down and switch to the 2.4GHz band. Make sure that the router broadcasts a 2.4GHz band before you attempt lorex wifi setup process.
- Router placement tips
The location is the biggest concern when you are installing a camera at your home. You have to ensure that it stays connected to the wifi router network at your home. Ensure that the camera is installed at least halfway between the router and the maximum coverage spot to ensure strong signals access.
- Resetting the camera and retrying setup
If the setup process fails, you can always reset your camera to clear cached network data and resolve pairing issues. Camera reset is among the most effective fixes for failed lorex camera internet setup attempts.
How to Reset Lorex Camera and Re-Setup
When to reset Lorex camera
Reset the camera if you are facing persistent issues with the setup process. If the camera freezes during setup, disappears from the app or fails to pair, you can reset it to factory settings. It is also recommended that you change router or network credentials once.
Soft reset vs hard reset
You can power cycle the camera by unplugging and restarting it. This process is often called the soft reset process and is the easiest to complete. The hard reset process, on the other hand, uses the physical reset button on the camera to delete all settings and reconfigure the device.
Steps to reset different Lorex models
Open the camera casing and locate the reset button on the device. Press and hold the reset button for about 10-30 seconds until the LED indicator flashes, or you hear a confirmation tone. This will signal that the reset process has started. You can now allow some time for the device to reset and then proceed with the reconfiguration steps later.
Reconnecting camera after reset
After the camera is reset to factory settings, open the app and repeat the how to setup lorex camera process. This will include the WiFi pairing and device registration steps.
Lorex Camera Firmware Update During Setup
- Importance of firmware updates
Skipping firmware updates can put your camera at risk of hacking. The data on the camera may be hacked and misused. In addition, updates to the firmware version help improve the system stability, patch security vulnerabiltieis and add more features while also fixing known bugs. Many internet connection issues or minor imperfections are fixed during the lorex camera setup.
- How to check current firmware version
You can check the current firmware version of your lorex camera using the Lorex Home app. Open the app on your smartphone and then head to the Settings menu. Here, head to the device information section and you will see the information related to the camera firmware version.
- Updating firmware via app or system
Lorex camera firmware updates are automatically downloaded and installed from time to time. When you do the initial lorex camera setup process, it is also updated that time. Alternatively, you can always update the firmware manually by following the app update method.
- Fixing update errors
If an update fails to complete, ensure that the internet connection is stable enough. You can restart the camera and try again. Firmware issues often help resolve themselves after a quick reboot.
Lorex Camera Setup Troubleshooting Guide
Camera not turning on
No video signal after setup
App not detecting camera
Motion alerts not working